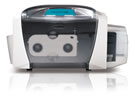
Guide to Persona C30e Printer Setup and Installation
While unpacking the printer, inspect the packaging to make sure that no damage has occurred during transit. The following items are included with the printer:
1. Power Supply
2. Power Cable
3. Software Installation CD/User Guide
4. User Guide
5. Warranty Statement and Registration Card
Connecting the Printer Power
1. Plug the AC adapter power cable into the back of the printer.
2. Plug the wall power cable into the AC power adapter.
3. Plug the wall power cable into a standard 110VAC power outlet.
Install the Ribbon Cartridge
1. Open the front Cover by pressing the black rubber pad and lowering the cover down.
2. Remove the liner on the card cleaning roller (there is a blue arrow on it) and remove the ribbon securing (this is a blue piece on the back of the cartridge).
3. Slide the ribbon cartridge into the printer.
4. Close the front cover and press the front cover’s black rubber pad until the front cover is securely closed.
Installing Blank Cards into the Card Hopper for Batch Mode Printing
1. Open the card hopper cover.
2. Press the card hopper load lever down until the card tray locks in place.
3. Load up to 100 cards into the hopper. Print side goes down.
4. Close the card hopper cover to release the card tray.
Lower the Card Output Hopper
Pull the output hopper down until it snaps into place.
Install the Print Driver
Close all programs and insert the software installation CD into your computer’s CD drive. The CD’s installer program will automatically open. Follow the CD’s on-screen procedures to complete the installation. During this installation, you will be directed to connect the USB cable and specify the ribbon that will be used.
Printing a Test Print Image
1. Go to your computer’s startup menu. Select Settings>Printers and Faxes or Printers.
2. Double click on the card printer under the printer’s window.
3. Select the printing preferences under the printer drop-down menu which will bring up the printing preferences window.
4. Select the card tab and click on the Test Print button. The image is copied to the printer.
For additional information about Persona C30e printers or photo ID card systems, contact our ID card experts at 888-485-4696.
