Tag Archives: Evolis Pebble

Evolis Card Printers – Card Feed Problems

This tech-tip is intended to help resolve card feed problems with Evolis Tattoo2, Evolis Pebble4 and Evolis Dualys3 plastic card printers. Some of the remedies may also apply to other Evolis printers, and those from other manufacturers.
Evolis Tattoo2, Pebble4, and Dualys3 - Card Feed Problems

Plastic card printers may have instances when they will not feed cards consistently from their card input hoppers. This can occur when there are just a few cards in the hopper. But it is more common when their card hoppers are full.

Usually, the cause is not with the printer itself. Rather, the problem most often is the result of the cards being difficult to separate.

Card Feed Problems – Remedies:

Before attempting remedies, remember to handle blank plastic cards carefully, and only by their edges. This will prevent the transfer of lint, dust, and residual body-oils from your fingertips. The presence of any of these contaminants can result in poor print-quality.

  1. Remove the cards from the input hopper and fan out or shuffle them to break any static-bond, and to dissipate natural static charge
  2. Check the card thickness gauge and set just slightly more than your blank cards’ thickness. For example, if the cards are 30 mils thick, adjust approximately 32 or 33 mils.
  3. Clean the card intake roller with alcohol wipes and/or an IPA alcohol cleaning card. Both are included in the Evolis #A5021 UltraClean printer cleaning kit.
  4. Ensure the cards are stacked properly in the card hopper, and that there are no obstructions that might prevent the printer from extracting them.

Need further assistance or more info?

Safe-Card ID Services offers our clients free telephone-based tech support for the life of all printers sold. For additional assistance, or other information about all Evolis printers, please contact our ID-card experts toll-free at +1 888.485.4696 (US & Canada), or +1 704.535.5200 (elsewhere).

Based in Angers, France, Evolis is a leading global manufacturer of quality plastic card printers.

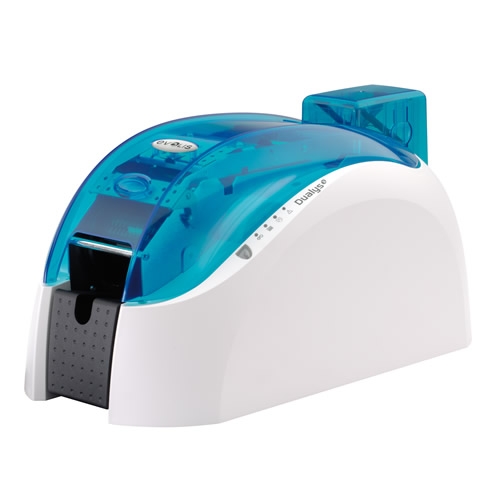
Evolis Pebble or Dualys – Printer Won’t Feed A Card

Here’s a problem that occasionally is presented to our technical staff: An Evolis Pebble or Evolis Dualys printer won’t feed a card.

Most Likely Causes when a Printer Won’t Feed a Card:

Evolis printer won't feed a card

Evolis Dualys3

  1. Printer needs a cleaning
  2. Cards sticking together
  3. Thickness gauge set too narrow
  4. Hopper not completely inserted
  5. Cards not loaded properly in hopper
  6. Worn card input roller

More details and suggested steps for resolution:

  1. Needs cleaning: As you use the printer, with each new card inserted, minuscule amounts of dust, lint, and card-manufacturing remnants go into the printer with the card. The printer transport rollers are sticky or tacky to the touch specifically so they can move the card forwards and back during printing. Over time, these contaminants adhere to the rollers which can make them slip on glossy card surfaces. Each cleaning of the printer should consist of using an IPA alcohol impregnated cleaning card, followed by an IPA soaked cleaning wipe, and then finally a pass on the print-head with an IPA alcohol foam-tipped swab. These items are included with a standard Evolis UltraClean Cleaning kit #A5021.
  2. Card sticking together:  This can occur for a variety of reasons, but the most common is static cling. Yes, the force of nature that makes your socks stick to your dress in a dryer, can make PVC cards stick to one-another. If the static bond is stronger that the force imparted on the card by the transport roller, then the printer won’t feed a card. Fortunately, you need only to break the static bond to get things going again. Handling the cards only by their edges, manually separate and shuffle the cards, then reinsert them in the card hopper. The mere act of separating them will dissipate the charge and the cards should feed normally.
  3. The card-thickness gauge is manually set, and is located just behind the top cover of the printer – between it and the card-hopper. There are a series of graduation marks on the gauge. Slide it right or left to set a thickness appropriate for your cards. We recommend setting the gauge to a thickness just a bit larger than your cards. So, if you’re using standard 30-mil cards, set the gauge to about 32-33. Setting this properly ensures cards will be pulled more consistently, should they have slight warping or are slightly thicker than normal.
  4. If the card input hopper is not fully seated, it can also cause mis-feeds or no feed at all. Remove the card hopper, check for and clear any obstructions, then re-seat the card hopper. Press down firmly to ensure it is seated fully.
  5. If the card hopper is not loaded properly, cards will not feed into the printer. Remove the card hopper, then remove and re-insert the cards to ensure they are placed properly. This is also a good time to check for any card static-cling issues, as in #2, above.
  6. Last, but not least, you could have a worn card intake roller. With age and use, the input and transport rollers of all card printers are subject to wear and degradation. The rollers will become hard and slick over time, making it difficult for them to do their jobs. They CAN be replaced, but the labor-portion of such a repair can be very high. This is because it requires the full disassembly and reassembly of the afflicted printer. Contact our service department for more information, should this be the case.

Need more info?

For more information about Evolis card printers – the Evolis Pebble or the Evolis Dualys, contact our ID-card experts toll-free at +1 888.485.4696 (from the US or Canada), or +1 704.535.5200 (elsewhere).

How Long Can I Expect My ID Card Printer to Last?

As with any piece of technology, your card printer will not last forever regardless of how much money you spent on it new. The typical life of a card printer varies significantly from user to user, and in most cases has nothing to do with the actual number of cards printed but more with the maintenance schedule and the number of people using the printer. Most direct to card printers come with coverage for 2 years, like the Fargo DTC1000 and some 3 years like the Evolis Pebble or Dualys, so you should expect to have it for at least that long. For professional level systems and secure applications, choosing a re-transfer printer such as the Fargo HDP5000 will provide more peace of mind, since re-transfer card printers come with lifetime print head coverage.

So what happens when your printer stops working and the warranty coverage is up? Some repairs can be done onsite with guidance over the phone while others will require a technician to diagnose the issue. Advances in technology have pushed printer price down, so be sure to compare the cost of a repair to the cost of a new printer. Depending on the age of your printer, it is sometimes more cost effective for you to put your money towards a new printer. 

In some situations you will be forced to upgrade since older printers and drivers will not work on Vista or Windows 7. When purchasing a printer be certian to ask about the availability of an extended warranty and a loaner program so you can minimize downtime.

Call an expert at Safe-Card ID Services to learn more.


How to Remove and Replace an Evolis Pebble Printhead

Our technical area is busy with different questions our customers have about printers and how customers can get the most efficient operation from them. One popular question about the Evolis brand printers is about the printhead removal and replacement. The following video was prepared to demonstrate how to remove a printhead from the Evolis Pebble printer and then replace it wil a different printhead.

Steps:
1. Remove the hopper.
2. Open the top cover.
3. Push the support mechanism in to release the printhead.
4. Slide the printhead up and over the metal holder.
5. Unplug the wire harness.
6. Reverse the steps to put the new printhead into place.

Once the above steps are completed, the printer is ready for use.

If you need information about the Evolis printer brand, please contact our ID card experts at 888-485-4696.

Add Holograms to Your ID Card Program

Concerned about the security of your ID Card Program? Well, by adding a holographic overlay to your  ID Card design you can help protect your program from being infiltrated by counterfeit cards.  This feature helps guard against illicit replication and tampering.
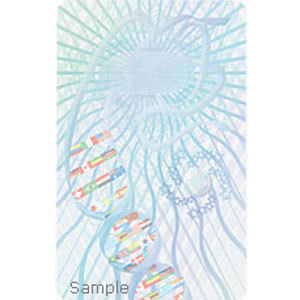
There are three ways to place a holographic image over your card design. The first is with a laminating card printer that applies a holographic overlaminate during the printing process with a special ribbon all in one pass. Printers such as the Fargo DTC4500 or the HDP5000 can feature this functionality.

The second way is with a special holographic ribbon that applies the image during a second pass. You simply change out your ribbon and rerun the cards to achieve the desired effect. This allows users of printers like the Evolis Pebble or Dualys to achieve the same results as a more expensive laminating printer.

Finally. you can purchase a holographic overlay that is applied by hand. Although more expensive on a per card basis, it allows you to add a holographic image to cards when the volume might not dictate the purchase of an entire ribbon or a laminating printer.

Different printer manufactures have generic images on the ribbons but you can also have a custom image designed with your logo or artwork. Contact an expert at Safe-Card ID to learm more about custom holographic ribbons or if a holographic ribbon is availible for your printer.

Evolis Pebble 4 – All the Lights are On

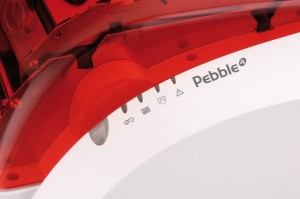
If you are trying to print cards with your Evolis Pebble printer and find it not functioning properly, some setup changes or adjustments may be needed. If you notice that all the lights are on (indicator lights above the main power button/light), follow the steps below to see if the problem can be fixed.

Pebble 4 - All the lights are on

Verify Printer Set-up:

  1. Make sure cards are loaded into the card hopper, the card hopper is properly fitted to the printer, and there are no obstructions in the hopper or the card input path.
  2. Check the card thickness gauge and set it to a value just above the thickness of your cards. (e.g. – if you use standard 30 mil cards, set the gauge lever just above 30, to approximately 32 or 33).
  3. Make sure you have print ribbon remaining on the current spool, and that it is loaded properly. If you are unsure about the proper fitment of the ribbon, there is a manufacturer’s sticker on the inside of the ribbon cover that depicts the proper placement.
  4. Verify that the USB or the network connection is firmly attached to both the printer and the host computer or network jack or switch.
  5. Ensure the power connectors are firmly and properly seated at each of the wall-plug, the AC/DC adapter, and the printer. While doing so, also verify you have the correct power adapter – Evolis original-equipment AC/DC adapters are branded as either “Evolis” or “SwitchBox”, and have output power of 72w (24v @ 3A).

Verify Computer Set-up:

  1. Open the Windows “Devices and Printers” view (“Printers and Faxes” if Windows XP). You can find this link from Windows Control Panel.
  2. See if you have just one, or multiple instances of the Pebble printer listed (e.g. – “Evolis Pebble”, “Evolis Pebble (Copy 1)”, etc.). If multiple instances exist, the ones that are “greyed out” can and should be removed sequentially by right-clicking on each icon, then selecting “Remove this Device”. You should then be left with just one, functional instance of the printer/driver.
  3. Disconnect the power to the printer, or power off with a 2 second push of the printer power button.
  4. Clear the Windows print queue by right-clicking on the Evolis Pebble printer and selecting “See What’s Printing”. When the print queue view opens, if any pending or in-process print jobs are present, click “Printer” on the menu bar, and then click “Cancel All Documents”. Verify with “OK” if requested. Wait for all jobs to clear before closing the queue view.
  5. Determine which ribbon is in the printer and ensure the Windows print-driver is set for use of this ribbon type as follows:
    1. Locate then right-click on your Evolis Pebble printer, then select “Printing preferences”.
    2. Near the top of the “Graphics” tab, you will see a ribbon designation, and a drop-down box that allows you to set the ribbon type manually. Ensure this setting matches the ribbon you have loaded in the printer. The most common settings will be the R3011 ribbon, when printing full-color cards, or R2011 when printing black-only, monochrome cards.
  6. Reconnect or power-up the Pebble printer again.

Confirm the Results:

  1. Once again open the Windows “Devices and Printers” view (“Printers and Faxes” if Windows XP).
  2. Locate the Pebble printer, then right click on it and select “Printing Preferences”.
  3. Select the “Tools” tab, then click the “Test Card” button on the top-left of the screen.
  4. If a test card prints normally, you have verified that the printer is set up properly, and that Windows has been set up properly as well.

Verify the Software Set-up:

There are a variety of card-printer software packages available, so our advice here is limited and generic:

  1. Open the software program you use for card-printing;
  2. In your printer settings, ensure that you are directing card output to the Evolis Pebble printer;
  3. Verify that any document or page set-up options, including portrait/landscape orientation, margins, paper (card) size, and range / record selections have been made properly.
  4. If one card template or file is causing issues, try another to see if it works. If one works, but another does not, your problem is with the setup options of the non-working card file.

Following the steps above will usually resolve a Pebble printer issue when all the lights are on,  If the problem persists, additional steps may be needed to reset the printer. Evolis printers purchased from Safe-Card ID come with free telephone technical support for the life of the printer. If you are such a client and need personalized assistance, we’d be happy to help you! Contact us toll-free at +1 888.485.4696, and have your customer or invoice number handy, along with the printer serial number for fastest service.

Evolis Pebble Printer – How to Clean the Cleaning Rollers

The Evolis Pebble ID card printer will provide colorful, personalized ID badges for many years. In fact, Evolis believes in their printers so much they provide a three year warranty on this printer which is one of the longest manufacturer warranties in the business.

To keep your printer working at it’s best, it is important to follow manufacturer recommendations for maintenance. The following Evolis video demonstrates how to clean the cleaning rollers in an Evolis Pebble printer.

1. Open the printer cover.

2. Remove the printer ribbon.

3. Locate the cleaning roller and remove it from its housing.

4. Use a cleaning wipe provided by Evolis.

5. Remove any dust by gently rubbing the wipe across the roller surface.

6. Once the roller is clean and dry place it back into the printer.

7. Set the ribbon back into the printer.

8. Close the printer cover.

If you are interested in information about the Evolis Pebble printer or other Evolis printers available, contact our ID card experts at 888-485-4696.

Evolis Pebble Printer – How to Clean the Printhead

For best ID badge printer performance, it is recommended that you keep your printer as clean as possible. To keep the printhead free of any dust particles, follow the manufacturer’s recommended cleaning schedule. The following Evolis video displays how to clean the printhead with a cotton swab from your Evolis cleaning kit.

1. Unplug the power cable to power off the printer.

2. Open the printer cover.

3. Use a cotton swab from your cleaning kit and press the center of the tube until it clicks and releases the cleaning product.

4. Gently apply the cotton swab onto the printhead moving it from left to right and for a few seconds.

5. Close the cover.

6. Wait a couple of minutes before using the printer until the cleaning product has dried.

7. Reconnect the power cable.

If you are interested in information about the Evolis Pebble printer or other Evolis printers available, contact our ID card experts at 888-485-4696.

Evolis Pebble Printer – How to Print a Test Card

1. Make sure a ribbon is installed in the printer and that a blank card is loaded in the feeder.

2. Switch off the printer by pressing the push button for a few seconds. The green LED light switches off.

3. Then power on your printer while simultaneously pressing the push button.

4. Release the button when the LED light starts blinking.

5. The test card is printed within seconds. It displays information such as the printer model and serial number.

6. The test card is then ejected into the output hopper.

If you are interested in information about the Evolis Pebble printer or other Evolis printers available, contact our ID card experts at 888-485-4696.

Evolis Pebble Printer – How to Load Cards

The Evolis Pebble printers provide sharp, colorful custom ID cards. When installing the printer, it is important to know how to correctly place PVC cards into the card hopper. Following these instructions regarding the proper way to load cards into the Evolis Pebble card printer:

  1. Press on both sides of the feeder and detach it from the printer by lifting it up and out.
  2. Flip the feeder over to gain access to the lower part.
  3. Depress the plate and insert the cards Repeat the process until you have filled the feeder with the required number of cards.
  4. If required, adjust the gauge from right to left to match the thickness of the cards to be processed.
  5. Insert the feeder back into the printer, The feeder will be correctly positioned when you can hear a click when inserting it into the printer.

If you are interested in information about the Evolis Pebble printer or other Evolis printers available, contact our ID card experts at 888-485-4696.