Author Archives: Safe-Card ID Team

Zebra Printer – Drivers and Firmware

Zebra

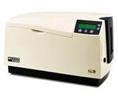
At times, it is necessary to update the drivers and firmware for the Zebra ID card printer. The newest drivers can maximize your id card printer performance and capabilities. If you find yourself needing a driver or firmware, locate the printer model that you are using. Then, go to the drivers and firmware download page on the Zebra website.

After selecting the printer model you have, you will be provided with the latest software updates available.

Safe-Card ID provides printers and supplies from Zebra. Current printer models are the P110i, P330i, P430i and P520i. Contact our id card experts for information or assistance with Zebra printers.

Upgrading the Printer Firmware on your C30 or DTC400 Printer

Here are the steps to upgrading your printer firmware:

1. Go to www.fargosupport.com and download the current firmware into a new folder on your computer. The file will be in a zip format so you will want to unzip it in the folder you have created.

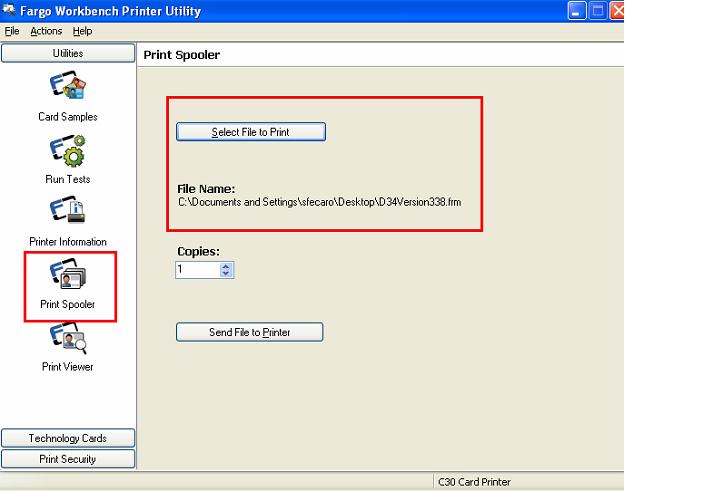
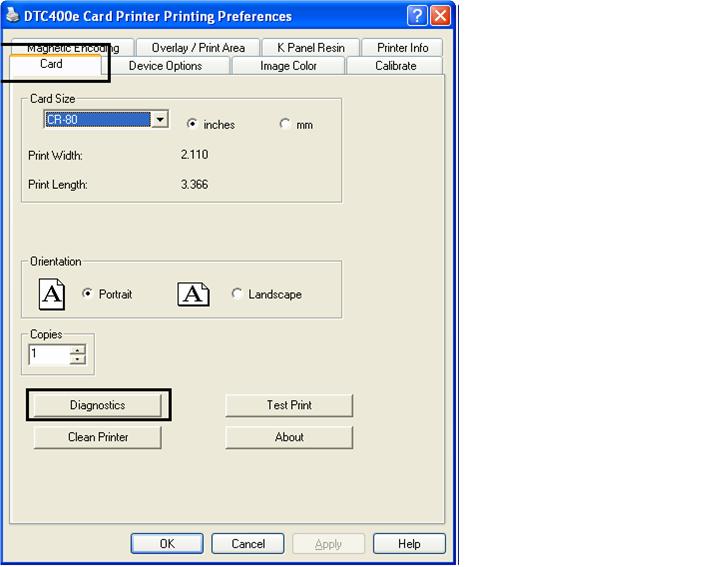
2. Open the Fargo Workbench Printer Utility. You will see the following:

Printer Printing Preferences

3. Open the print spooler. Select File to Print and browse your computer to locate the firmware file you downloaded and saved into the new folder. The firmware is a .frm file.

Fargo Workbench Printer Utility

4. Prepare the printer for the firmware upgrade by pressing and holding down the Pause and Power buttons at the same time. At the same time, plug in the power. You should see the Power and Pause buttons blinking.

5. Go back to the Workbench screen and select Send File To Printer. At this time, the lights will flash fast as the Firmware is updating.

6. When the Firmware is updated, the printer will restart and the lights will remain solid while on.

7. You have completed the update.

For additional information about Fargo printers, contact our ID card specialists. They will be able to assist you with Persona C30e or Fargo DTC400e printer questions.

Evolis Pebble 4 Printer – Cleaning the Printhead

Following is a video demonstrating how to clean the printhead on an Evolis Pebble printer.


To clean the printhead, follow the directions displayed in the above video.

      1. Remove the power plug
      2. Open the top cover
      3. Break the vial in the printhead cleaner and allow the fluid to run to the swab
      4. Run the swab across the printhead.
      5. Close the top cover
      6. Reinstall the power plug
    7. Check for power.

Please call one of our technicians at 704-535-5200 for additional support!

Fargo DTC525 – Printer Front Panel Not Functioning

DTC525

Following is a question received from our technical support response team:

Question:

Our Fargo DTC525 printer has a problem. Our front panel buttons do not work. The LCD display is fine, however.

Answer:

It sounds as if your front panel control is not working. You need to have a service repair provided on the printer. Contact your solutions provider for details on repair procedures.

For additional information about the current Fargo printer models, let our id card experts provide you with a free consultation.

Fargo 500 Series Print Quality

DTC525

Following is a question received from our technical support response team:

Question:

We have a Fargo Printer. Generally the print quality on the card is good and there are no lines or streaks like that indicating print head damage. We do get what I can only call a smudge on the first 1/2 inch of the card. Any ideas?

Answer:

You might go to the print driver settings to change the way the printer prints the card. This can be found in the printing preferences. Go to the device options tab and choose “rotate front 180 degrees”. Then print a card. This may fix the problem.

If not, try downloading the latest print driver from Fargo.

If the problem persists, contact your solutions provider for technical assistance or the Fargo Technical Support line at 800-459-5636 for specific repair information.

For additional information about the current Fargo printer models, let our id card experts provide you with a free consultation.

Printing Black Text on the Back of an ID Card

custom id

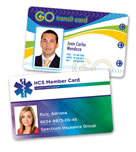
Many id card printers provided to groups and organizations are single sided id card printers. These printers are able to print single color or full color printing on one side of the card. Things go along smoothly for a while, and then someone from the organization decides that it would be nice to be able to make use of the back of the card since it is blank. Examples of things printed on the back of the card are company contact information, mission statements, organizational reference information or directions as to what to do if the card is lost and needs to be returned to the owner.

Many organizations use a simple process to print the needed information on the back of the card. In one of our earlier posts about dual sided id cards with a single sided printer, we explained that you could print the front side of the card and then flip the card over and print the back side of the card. Although that process will work, there is a smoother process if the information on the back of the card is always identical on each card. Here are the steps.

1. Purchase a black ribbon to use solely on the back of the card.
2. Design the card back in your id card software design program.
3. Install the black ribbon into the printer and verify the printer and software program are set up to print with a black ribbon.
4. Print the back side of the card for the number of badges needed.
5. Turn the printed cards and reposition them in the printer so that the front of the card can be printed.
6. Swap out the black print ribbon for a full color ribbon.
7. Print front side of the card with your design software and printer.

After checking the output hopper, you should find that the card has print on both the front and back side of the card which has been completed by your single side id card printer.

For additional hints and tips for your id card printing project, contact our experts toll free at 888-485-4696. We specialize in Fargo printers, Evolis printers, Magicard printers and CIM printers.

Datacard Printer – Card Jam Error

Datacard

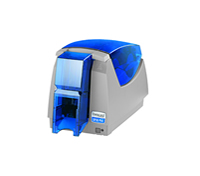
After a clear card option has been installed in a Datacard card printer SP35 Plus or SP55 Plus, a card jam error my occur. The same error may occur when after replacing the main control board.

To clear this error the printer will need to determine the sensor type. For the printer to recycle through and make this determination, a power on test card is required using the appropriate clear or opaque card type to force the firmware to redetermine the sensor type. Each time the card is changed from clear or opaque to the other type, a power test card will be necessary to redetermine the sensor type.

For additional information about Datacard printers currently on the market, SP25 Plus, SP35 Plus, SP55 Plus and the SP75 Plus, contact our id card experts toll free at 888-485-4696.

Fargo DTC525 – Please Wait Message

DTC525

Following is a question received from our technical support response team:

Question:

When we turned on the printer and wanted to print a self test, the LCD display provides a please wait message for quite a long time. Nothing is happening with the printer. What is the issue?

Answer:

If you are running the self test from the LCD panel on the printer and not from the print driver on the computer, you may have a problem with your main control board in the printer.

If the problem persists, contact your solutions provider for technical assistance or the Fargo Technical Support line at 800-459-5636 for specific repair information.

For additional information about the current Fargo printer models, let our id card experts provide you with a free consultation.

Datacard Printer – Card is Stuck in the Print Area Error

Datacard

When printing ID cards and the PVC cards are placed in the correct position to input into the printer, occasionally a “card is stuck in the print area” error may be given by a Datacard SP series id card printer. When this error displays, the most probable cause for the error is due to dirty cleaning rollers.

The cleaning rollers must be sticky enough to grab the card and pull it into the printer. The card may not be grabbed securely enough to clear the card input photocell in time. The card lagging behind may cause the photocell to interpret the situation as a card stuck in the print area, thus displaying that indication. To correct this error, clean the upper and lower cleaning rollers.

If the rollers are not sticky after you have cleaned the rollers, then they will need to be replaced for best operation of the Datacard card printers.

For additional information about Datacard printers currently on the market, SP25 Plus, SP35 Plus, SP55 Plus and the SP75 Plus, contact our id card experts toll free at 888-485-4696.

Evolis Pebble 4 – Printing a Test Card

Following is a video from the Safe-Card ID Team that illustrates how to print a test card using an Evolis Pebble 4 ID card printer.

Directions to Print a Test Card

1. Check to make sure that there is a print ribbon and pvc cards in the printer.

2. Power the printer off.

3. Push the printer power button and turn the power back on. Without releasing pressure, continue holding the power button until the light flashes.

4. As you hold the power button in, the printer will pull a PVC card through the printer and print a test card.

5. Keep the test card in a safe place as it will contain specifications about your printer that may be needed for future parts or repair.